You can insert a table into a text element using the Text Editor.
- Place a text element in the content where the table should be inserted
- Click in the text element. The text editor opens.
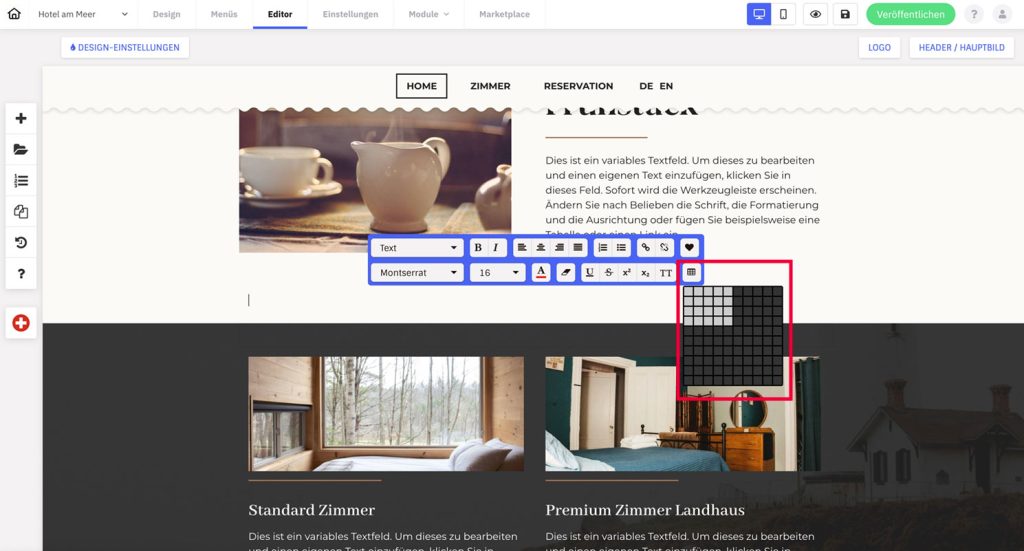
- In the text editor, click the table icon (bottom right). A grid field opens.
- Each square represents one field. Move the mouse over the grid until the desired number of columns and rows are highlighted, then click there.
- The table is inserted. You see fine gray lines with the fields.
- Click in a table field and now insert text and style it with the text editor
Attention: Adjustment of column width as well as background colors is not possible at the moment.

Delete table
If you do not want to delete the whole text element, proceed as follows:
- Click in the table. The text editor opens
- Click on the table icon
- Click the trash can icon to delete the entire table
Delete individual columns or rows
- Mark the table fields with the mouse. The text editor opens.
- Click on the table icon
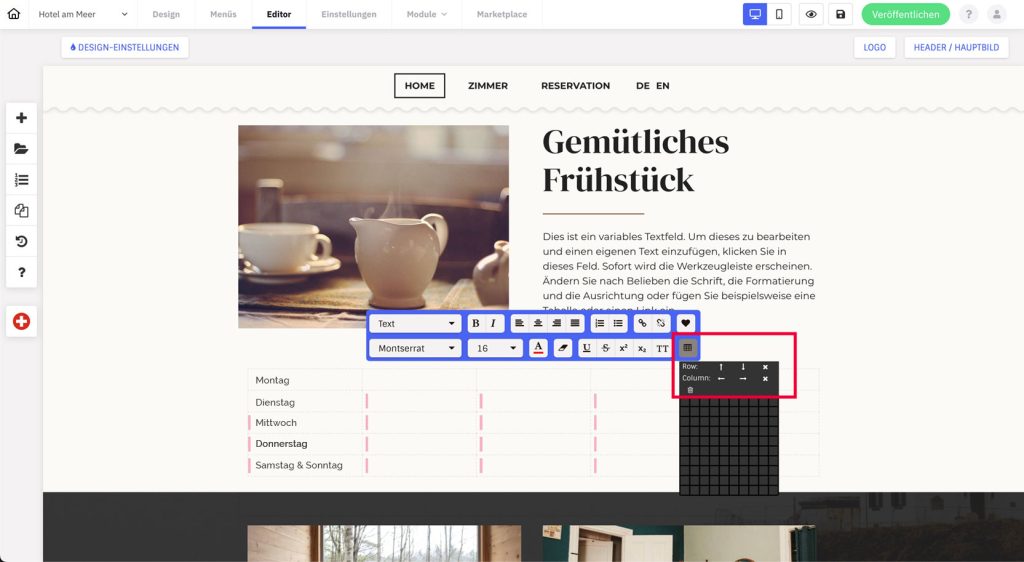
- You now have Row and Column at the top and a cross symbol on the far right.
- Click the cross icon by row or column to delete the selected elements.
Add single columns or rows
If you want to delete or add individual columns or rows, proceed as follows:
- Mark the table fields with the mouse. The text editor opens.
- Click on the table icon
- You now have Row and Column at the top with arrow icons
- Click on one of the arrows to insert a new row or column above/below (for rows) or left/right (for columns) your selected table fields.
