
Migrations are often a challenging and sometimes complex process. To make the migration to our vDC as easy as possible, we will show you in this FAQ how to move your VMware environments to your vDC environment at hosttech.
Variante 1 – Einfach und Optimal
To start, first uninstall all drivers (Windows) and delete the VMware tools. The VMDK image is then converted to a RAW image and then mirrored to a second storage via a temporary Linux VM in your vDC.
To do this, follow the steps below:
- First you create an Ubuntu VM in the vDC panel (this can be very small e.g. 1 core & 2GB RAM)Important: The hard disk size of the created VM must be large enough to accommodate the VMDK file.
- After the server has been created, a second storage is created. This should have the desired target size of the VMDK.
- Now connect the second storage to the Ubuntu VM using drag & drop.
- Start the Ubuntu VM and establish an SSH connection.
- Now transfer your VMDK to the new server, e.g. via SFTP or SCP.
- The converter is then installed with the following command:
aptinstall qemu-utils -y - The conversion to RAW format is then carried out directly on the second storage:
qemu-img convert -p test.vmdk -O raw /dev/sdb
If the following message appears, the 2nd storage must be enlarged in the panel:qemu-img: /dev/sdb: error while converting raw: Device is too small
The current process should look like this:root@vmdk-convert:~# qemu-img convert -p test.vmdk -O raw /dev/sdb (3.00/100%) - After completion, shut down the Ubuntu VM (poweroff) and disconnect the second storage from the VM.
- Now create another VM without storage and attach the storage you have just decoupled to the new VM.
- Now switch on the server and the converted image should start.
Variante 2 – für Ausnahmefälle
The second variant is much more complicated and should only be selected in exceptional cases.
Here, the VMDK image must first be transferred via scp to a vDC host with qemu-img tools (QEMU disk image utility) installed in order to then start the VMware image in another virtualization environment (Hardware Profile – Nested Virtualization) and install the desired VirtIO SCSI driver. With variant 2, variant 1 is carried out retrospectively, so to speak.
If you still need to use variant 2, you can follow the steps below.
Schritt 1: Vorbereitungen
The first step is to switch to your vDC panel and create a new server with a public IP address. As this is a virtualization system, you should make sure that there are enough resources available on the server, I would set 4 cores and 16 GB RAM as a guideline. In addition, “Nested – activate Nested Virtualization” must be selected as the hardware profile in the advanced settings.
Sufficient capacity must also be planned for the server storage, as the images to be converted must be transferred to it. For productive setups, realistic values are around ~500 GB storage capacity.
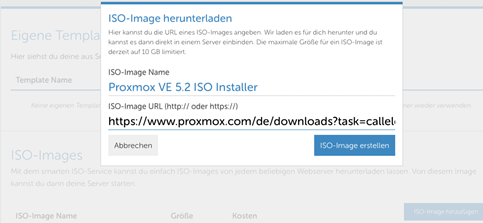
Next, the Proxmox ISO image must be integrated. To do this, go to > Templates & ISO in your menu and click on Add ISO image. Then enter a suitable name such as “Proxmox” and the link to the Proxmox VE ISO Installer and click on Create ISO image.
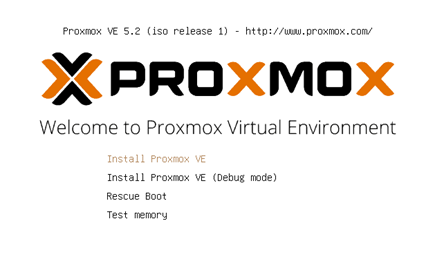
You then connect the Proxmox ISO to the newly created server. To do this, click on the server and click on Select ISO image to insert Proxmox. Once the preparations are complete, you can start your server and begin the Proxmox installation. If you now switch to the VNC console of the server, the Proxmox Welcome screen should appear.
Press Enter and follow the standard installation dialog. When the installation is complete, you can click on “Reboot” and then switch off the server in your panel and remove the inserted Proxmox ISO image.
Schritt 2 – übertragen des Images
After Proxmox has been installed, you can boot the server normally and log in with your root password. Now transfer the Vmware images you want to convert to the server via scp:
scp namedervmdk root@ipadresse:/name/des/zielverzeichnissesThen install the QEMU utility programs:
apt install qemu-utilsIn a further step, create a new storage with the expected size of the converted VDMK and also connect this to your server. This is necessary because we write the new image directly RAW to the new storage.
Now execute the following command to convert your image:
qemu-img convert vmdkdatei.vmdk -O raw /dev/sdbIn a further step, the VM is started and started with
qm setAttached the hard disk “/dev/sdb” from Dom0 to the VM. Then stop and start the VM again (so that it can be booted from IDE0).
Now install the desired VirtIO SCSI drivers, stop the VM and remove “/dev/sdb” from the server using the vDC GUI. Finally, mount the Windows RAW disk in the actual Windows server, select the standard profile, boot and install the remaining drivers (VirtIONet, Baloon, etc.).