
You want to move your website from shared hosting to your own dedicated server.
Here’s what you need and how to do it.
Requirements
Before you begin, make sure you have the following:
- The virtual server has been ordered and is active
- You can log in to Plesk on the vServer
- You have the FTP login credentials for the old (shared hosting) server
- If emails are to be imported:
- List of mailboxes
- The respective passwords
- If your website uses a database (e.g., WordPress):
- Database-Name
- Database User
- Database password
Preparation (Important Settings in Plesk)
Before you import the website, you need to adjust a security setting.
If you don’t do this, an error message will appear later.
- Log in to Plesk in your browser
- Click “Tools & Settings” on the left
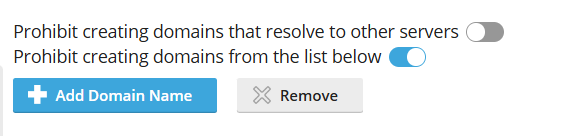
- click „Prohibited Domain Names“
- deactivate:
„Prohibit creating domains that resolve to other servers“
Website Migration
1. Domain anlegen
- Go to „Websites & Domains“
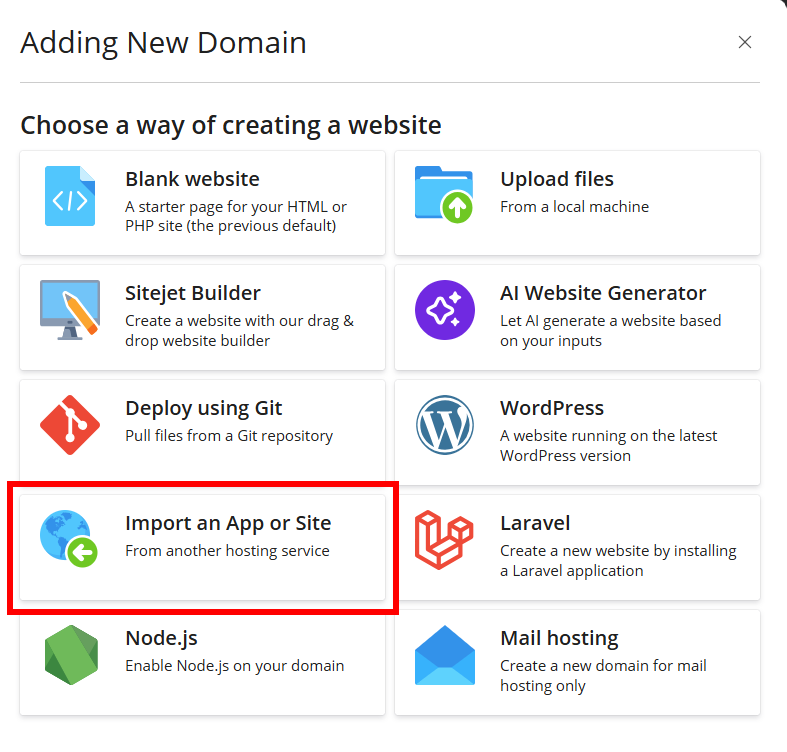
- Click „Add Domain“
- Choose „Import an App or Site“
- Enter your domain name
- Click „Add Domain“
2. Verbindung zum Shared Hosting herstellen
Now you need to enter the login credentials for your old hosting account:
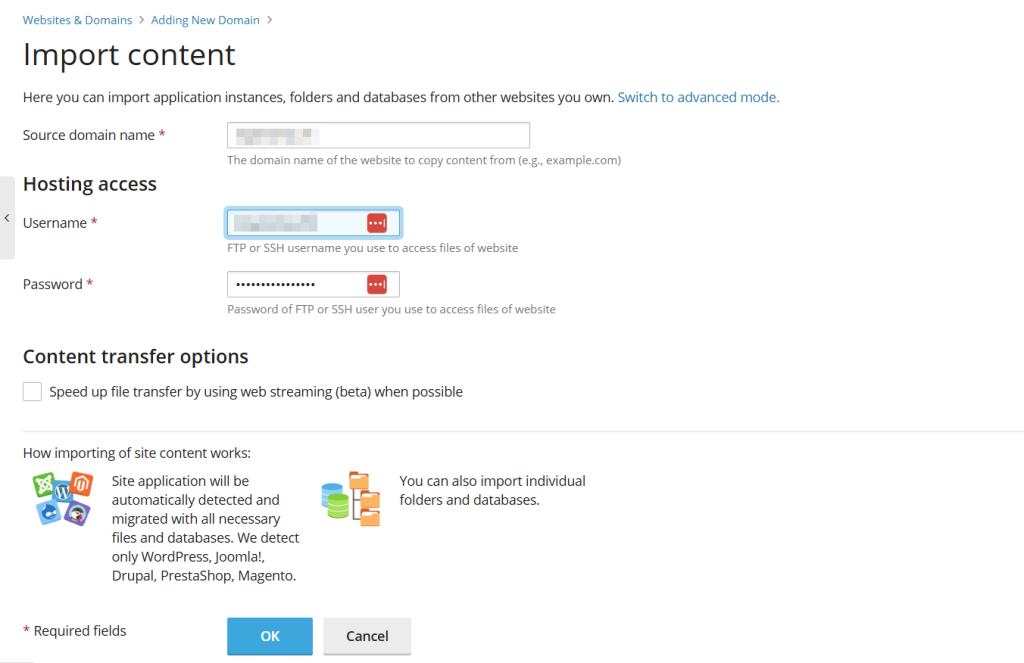
- Source domain name = Domainname
- FTP-Password
- FTP-Username
Click OK to confirm.
Plesk will now connect to the old server and analyze the existing files.
3. Webdaten auswählen
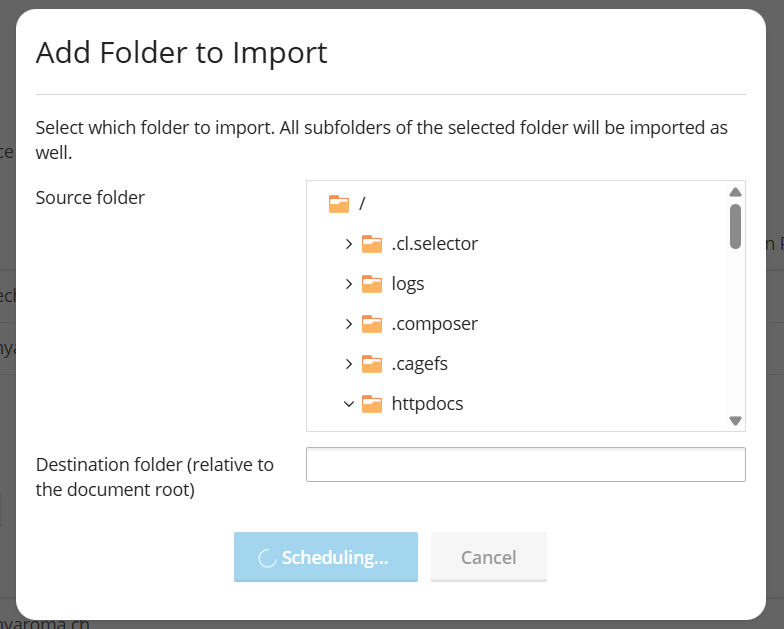
Now it’s up to you to decide what to include.
- Select the httpdocs folder
(That’s where the entire website is usually located)
4. Datenbanken übernehmen
If your website uses a database:
Enter the following for each database individually:
- Database-Name
- Database User
- Database password
If you don’t enter the correct login credentials, the website won’t work later.

Import emails
Emails are not automatically imported along with the website.
To do this, use the Mail Importer in Plesk as described in the FAQ.
Tip: Test the website (before the DNS change)
Once everything has been imported, you should test the website.
This is done via the so-called hosts file.
This allows you to view your website on the new server even though the domain still points to the old server. Learn more here.
Final step: Switch domains
DNS anpassen
The domain must now point to the new vServer. You can find instructions on how to change the DNS records in the FAQ.
SSL Zertifikat installieren
After the DNS change, you’ll need to install an SSL certificate (for HTTPS). You can read how to do that here.
Without SSL, a security warning will appear in the browser.